18 Tips to Freshen Up Your Yoga Practice

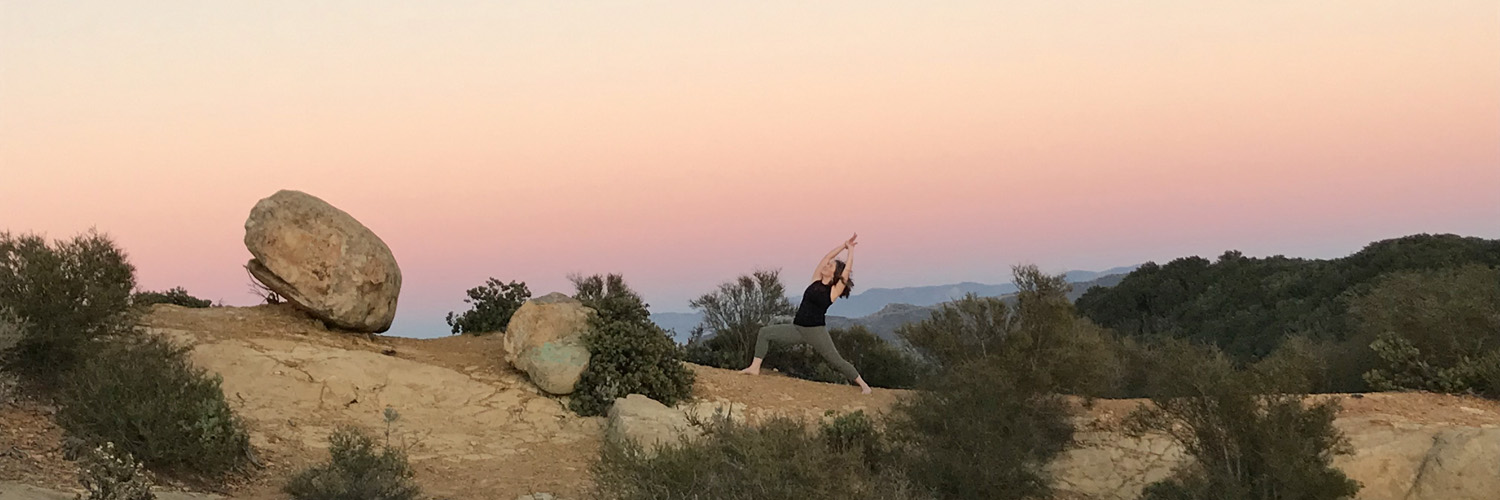
vinyasa-yoga-greece-retreat

What happens when you get bored with your yoga practice? I know that it happens to me. When I fall off the yoga wagon, especially as a yoga teacher, I begin to have feelings of guilt sneak in. Feelings of “I’m not good enough” or “How can I teach yoga if I’m not practicing?” So I want you to know that I’ve been there. I feel your frustration, your dismay, your guilt… I’m here to tell you to “let it go”. I’m not going to tell you to stop practicing, but I will encourage you to let your yoga practice take on a different form. Here are my tried and true tips for getting over your boredom and feeling good about your yoga practice again.

  1. Take class with a different teacher. I might get some flack here from other yoga instructors for saying this, but it’s okay to explore. It’s okay to skip your regular class and drop-in to another teacher’s class. Each teacher has their own style, their own way of cueing, and their own way of formatting their classes…. going to another teacher’s class gets you out of your rut and out of autopilot. You will likely experience different poses (woohoo!) and different benefits and alignment cues that you can bring back to your regular classes. And hell we all suffer from avidya (ignorance), which means that our own teacher can give us the same message every class and we may not be ready for it, so we don’t hear it… well you might be ready for it in another teacher’s class… or they may word it in a way that it is more relatable to you.
  2. Incorporate more pranayama, meditation and chanting. For most of us, myself included, we get stuck in asana land. I love asana land! It’s fun and pretty and challenging, but sometimes we forget about the other parts of yoga like pranayama, meditation, chanting. Learn some new pranayama (kapalabhati, brahmari, sitali, ratio breathing, etc.). Kick start your meditation practice. There are so many meditation resources out their now (including apps that make it ridiculously easy to practice). Or delve into the world of Bhakti and learn a new chant or two.
  3. Go on a retreat. Attending a yoga retreat (or teacher training) is a great way to get your asana in gear! It’s okay to spend a little extra money on YOU, on YOUR development, on YOUR growth. Don’t feel guilty about it. Go on a retreat with your favorite teacher OR one you’ve been following on social media OR be bold and courageous and book with someone you find online in a destination you’ve always wanted to check out (I would recommend doing some homework before you hand over your hard earned cash though).
  4. Try a new-to-you style of yoga. If you always practice Bikram, try vinyasa. If you always practice vinyasa, try yin. Maybe delve into the world of Ashtanga Yoga… why not? Be adventurous in your yoga practice.
  5. Change your environment. If you always practice in a yoga studio head on over to the local gym and try one of their classes. Or find an outdoor class at a local park or lodge. Seek out SUP yoga (yoga on stand up paddleboards)… you’ll get an awesome work out, be challenged in new ways and likely you’ll get wet… at least at your first class.
  6. Schedule up some yoga playtime. Connect with one of your yoga buddies and schedule some time to just play… maybe play with a little Acro yoga or partner poses or help each other work on those inversions and arm balances. Likely you’ll have fun in the process and make/keep a good friend too.
  7. Karma yoga. Okay it’s not asana, but it’s equally important. Find a volunteer gig at a local community center, teach a yoga class for underprivileged kids… even better get your yoga buddies together and do a little karma yoga as a group.
  8. Find another hobby. Eek! I know I said it, but it’s okay to branch out. I would recommend finding another active hobby like mountain biking or tennis… something that gets your body moving. Being active in other ways will make you appreciate your yoga practice that much more… especially when your muscles start to get tight and that range of motion you used to take for granted is gone.
  9. Read a yoga-ish book. I recommend How Yoga Works by Gesne Michael Roach and Christie McNally
  10. Take a trip. Allow yourself to be inspired by giant trees, mountains, lakes and even the hustle and bustle of a new city. Strike a pose and have fun with it. Put your feet in the dirt. Swim out to that tiny island in the lake. Enjoy the sun on your skin.
  11. Get a new mat or yoga leggings. I know, I know. Not very yogic of me, but whatever. Buy yourself something nice. Get a new Manduka mat in a fun color or get those wild and crazy patterned Liquido leggings you’ve been eye-ing forever. Give yourself a little extra incentive to get on your mat.
  12. Change your playlist. Okay this only applies if you practice at home, but music can have a huge impact on your practice and your mental state.
  13. Sign up for one of the online yoga class platforms. Create a home practice, try new teachers, practice when it works for you. Love it.
  14. Join a social media yoga challenge. A fun way to connect with other yogis, see new postures and new variations of familiar postures. Have fun with it.
  15. Focus on a specific body part or type of pose. Perhaps strengthening or lengthening the hamstrings. Focus on backbends or inversions. Perhaps focus on opening up your hips. You get the picture. Give yourself something to explore and also something to work toward.
  16. Schedule up a yoga and wine night with your friends. Why not? Yoga doesn’t have to be in the studio to be wonderful. Take turns teaching and follow it up with a glass or two of wine and some snacks.
  17. Practice shorter practices. Set a timer and allow yourself to be present on your mat for 5, 10, 20 minutes. Keep it simple so you don’t get discouraged.
  18. Go on a weekend yoga getaway. There are so many options these days. Go to a festival, conference, workshop or retreat in a different city or state. You’ll have the opportunity to get your practice back on track, explore a new place and make new yoga friends.


You don’t need to be perfect. You don’t need to practice 5 times a week. It’s okay to be inspired by other things. Your practice will always be with you. Know that your practice doesn’t need to look like everyone else’s practice. Remember it is YOUR PRACTICE. It is yours and yours alone AND it is a practice. Don’t beat up on yourself. Dig deep find that inner fire. It’s there. We will see you on your mat when you’re ready.

Yogis do you have any other tips or tricks you use when you get bored with your yoga practice? I’d love to hear them.


Love and Light,

Autumn

Autumn Adams
Follow me

5 Benefits of Practicing Yoga While Pregnant

prenatal yoga in bend oregon

I have been fortunate to work with many pregnant mamas through my prenatal yoga class in Bend, Oregon at Midtown Juniper Yoga. It is always a blessing and joy to watch these strong, beautiful women share their vulnerability, while nurturing themselves and their babies throughout their pregnancies. Often times the women that come to my class already have a yoga practice, but occasionally prenatal yoga is their introduction to yoga and what a wonderful loving way to be introduced to the practice and to experience all of the benefits of prenatal yoga.

Here I would like to share the benefits of prenatal yoga with you. If you’re reading this you’re likely already pregnant or know someone that is. Congrats! What an exciting time. As you seek out prenatal yoga classes in your area I encourage you to talk with the instructor before class. Find out their training. Do you like their energy? Do they also teach birth prep? Do they have a network of providers that they can recommend? Can they offer you modifications for both prenatal yoga classes and regular group classes?

Here are 5 Benefits of Prenatal Yoga:

  1. Reduced stress and anxiety.
  2. Improved sleep.
  3. Relief from common pregnancy related aches and pains.
  4. Connection with a community of women and your baby.
  5. Improved muscle tone, strength and flexibility.

Contraindicated Yoga Postures During Pregnancy:

  1. Deep twists.
  2. Prone postures (lying on your belly).
  3. Deep backbends.
  4. Inversions.
  5. Lying on your back for a long period of time (savasana).
  6. Standing with legs wide for an extended period of time.

Don’t let this list of contraindicated postures scare you. They can all be modified into a beautiful and fulfilling yoga practice… a practice where you can enjoy all the benefits of prenatal yoga.

I could easily make this list twice as long, but I’d like to keep it short and simple.

Need pregnancy yoga resources or live somewhere where you cannot find a prenatal yoga class? Here are some highly recommendable resources:

Autumn Adams
Follow me

What’s A Bandha?

Hey yogis, I’m here to clear things up about the bandhas. I’ve been to more than my fair share of group classes in which the yoga instructor says something along the lines of “engage mula bandha” without any extra guidance. There are so many new yoga students right now and honestly I’d like to give you a hand, to demystify the bandhas, and encourage you to keep coming back to your yoga mat time and time again. I know experiential guidance is even more powerful than just reading, but this blog post will at least get you started in the right direction… if you still need more clarification feel free to message me or join me for a Bandha Workshop.

WHAT ARE THE BANDHAS?

Bandhas are the activation and engagement of muscle fibers, in strategic areas in the body, that support in the toning and lifting of the systems of the body against the natural laws of gravity. Bandhas are used to stabilize the spine AND to draw kundalini upward.

3 Main Bandhas:

  1. Moola bandha (mula bandha)- The root lock
  2. Uddiyana bandha- Upward flying lock
  3. Jalandhara bandha- The throat lock

2 Secondary Bandhas:

  1. Hasta bandha- hand lock
  2. Pada bandha- foot lock

MULA BANDHA- “THE ROOT LOCK” (PERINEUM OR CERVIX RETRACTION LOCK)

Mula bandha forces the prana upward and prevents it from escaping out the lower outlets.

Mula Bandha Basics:

  1. Begin by practicing in a seated posture.
  2. Isolate the different parts of the pelvic floor (front-stopping pee, back-stopping poo, middle- pulling in and up (without engaging front or back))
  3. Lift from the perineum (male) or cervix (female); similar-ish to a kegel

Activating and engaging mula bandha tones and supports the internal organs of the lower abdominal cavity and brings much needed awareness to the space between the pubis (front) and the coccyx (back). This connection between front body and back body is usually saved for the psoas muscle, which due to habitual patterns of hip flexion in what we do for work and play is one of the major causes of lower back pain. Continuous awareness of the space between the pubis and coccyx and sitting bones in yoga poses and transitions can help alleviate already existing tightness, tension and/or lower back pain and can reduce the potential of lower back injury.

Gross (clench) vs. Subtle (lift) action

Practicing with a more gross, clenching sensation is okay when you’re learning to identify the muscles necessary to perform the bandhas, but in a regular asana practice the engagement is much more subtle… perhaps 20%.

Get Familiar With Your Pelvic Floor

Physiologically, this bandha is a diamond shape hammock of muscles that spans the space between the bones of the pubis in the front, the two ischium (sitting bones) on the sides and the coccyx in the back. These are your coccygeus, iliococcygeus, and the pubococcygeus muscles – known together as your Levator Ani, which form a part of the pelvic floor.

UDDIYANA BANDHA (THE ABDOMINAL RETRACTION LOCK)

Uddiyana bandha unites apana and prana at the navel center, the bandha described is called the rising or flying bandha.

Uddiyana Bandha Basics

  1. To learn Uddiyana Bandha practice in either a seated posture (with spine long) or standing posture with feet hip width and hands on thighs.
  2. Inhale fully inflating belly and lungs then exhale fully and forcefully until empty.
  3. With the breath held out draw your diaphragm in and up to hollow out the belly.
  4. Release your breath and uddiyana bandha when you cannot hold the breath comfortably any longer.
  5. Never exhale or inhale AS you move the body into the lock. Breathe after or before movement as appropriate.

Uddiyana Bandha increases vitality, toning effect on the visceral organs, muscles, nerves and glands, stimulates blood circulation and absorption. The heart is gently massaged and squeezed by the upward pressure of the diaphragm. The suction or negative pressure in the thorax draws venous blood up from the abdomen into the heart and at the same time, arterial blood is drawn into the internal organs.

Chakras most affected are:

Manipura (solar plexus), Anahata (heart), & Vishuddi (throat).

*contraindications: stomach or intestinal ulcers, uncontrolled high blood pressure, heart disease, glaucoma or raised intracranial pressure

JALANDHARA BANDHA (THROAT LOCK)

Jalandhara prevents an upward leakage of prana. Jalandhara regulates the circulatory and respiratory systems, stimulates the thyroid to balance metabolism, and is said to cure diseases of the throat.

Jalandhara bandha basics:

  1. Can be practiced in most postures.
  2. Full expression: shoulders up, chin to chest and jawline back.

Chakras most affected are:

Vishuddi (throat)

*contraindications: uncontrolled high blood pressure and heart disease

MAHA BANDHA (THE GREAT LOCK)

Maha bandha, or the Great Lock, is a combination of mula bandha, uddiyana bandha, and jalandhara bandha. Maha bandha should only be practiced under the guidance of an experienced teacher.

Don’t worry if bandhas continue to feel foreign. As you continue your yoga practice you will become more aware of the inner workings of your body.

Resources:

Pelvic Floor Dysfunction No More!

https://yogainternational.com/article/view/uddiyana-bandha-step-by-step

http://www.yogajournal.com/pose/net-bearer-bond/

https://www.jenreviews.com/yoga/

Autumn Adams
Follow me

What’s the Difference Between Cobra Pose & Upward Facing Dog

As a new yoga student it can be super confusing when the yoga instructor isn’t exactly clear on the difference between cobra pose and upward facing dog in a vinyasa flow class…. so lets take a moment to clear things up and help you figure out which one is best for your body.

Step 1: Let’s take a moment to look at each pose separately

Cobra Pose Sanskrit: Bhujangasana

yoga-pose-cobra-pose

Bhujangasana or Cobra Pose strengthens the muscles of the back, legs, and arms. It is often taught toward the beginning of a vinyasa flow class or as a preliminary backbend to deeper backbends.

Here are 7 Tips to Improve Alignment in Bhujangasana

  1. Lie on the floor on your belly with hands underneath your shoulders and fingertips just back behind your collar bones.
  2. Either squeeze your legs together or take them so they’re hips width distance. Press your toe nails into the mat and engage your legs. Press your pubis (commonly called your pubic bone) into the mat and think of lengthening your tailbone down toward the earth (this will help take some of the compression out of the lower back).
  3. Draw your elbows in and shoulder blades down your back.
  4. With an inhale breath peel your chest up off the mat using the strength of your back. Gaze is forward and down with the jaw line drawing slightly back to maintain length in the cervical spine.
  5. Think of engaging your lower abdominals to provide stability to your lower back.
  6. Elbows stay bent in Cobra Pose. And shoulders continue to draw down your back.
  7. You may use the strength of your arms to lift a little higher, but know to back off when you feel any compression in the lower back.

Exhale to come out of the posture.

Upward Facing Dog Sanskrit: Urdhva Mukha Svanasana

urdvha-mukha-svanasana

Upward Facing dog is used most commonly in a vinyasa class as a linking posture that links Chaturanga Dandasana to Downward Facing Dog (Adho Mukha Svanasana). It is important to maintain stability through your center and keep your legs engaged.

Here are 7 Tips to Improve Alignment in Upward Facing Dog

  1. Since upward facing dog is normally taught from Chaturanga that is how we will address it here. To make sure your shoulders are in the right place for your upward facing dog it’s important to press forward on your toes when you take your chaturanga, so your forearms are perpendicular to the floor and your upper arms are parallel to the floor.
  2. With an inhale begin to pull your chest forward through the arms and roll over the tops of the feet.
  3. Your legs are engaged. Tops of your feet pressing into the mat with legs and pelvis off of the floor.
  4. Your arms are straight and perpendicular to the floor with your shoulders stacked directly over your wrists.
  5. Engage your lower abdomen to maintain stability in the lower back.
  6. Gaze (drishti) can be forward or up, but make sure you’re not dropping your head back and collapsing into the cervical spine.
  7. When you’re in the posture make sure your shoulders aren’t lifting up to the ears. Shoulders are drawing down and back is the shoulder blades draw in and down.

Exhale to exit the posture.

Step 2: Let’s Compare Cobra Pose and Upward Facing Dog side by side

Cobra Pose

Upward Facing Dog

Elbows bent and drawing in Elbows straight
Hips and legs are on the ground Hips and legs are off the ground
Tops of feet pressing into mat Top of feet pressing into mat
Legs together or hips width If coming from down dog feet are hips width
Lower abdominal muscles engaged Lower abdominal muscles engaged
Shoulders drawing down the back (away from the ears) Shoulders drawing down the back (away from the ears)
Gaze is forward and down Gaze is forward or slightly up
Tailbone drawing down toward the floor Tailbone drawing down toward the floor
Inhale to enter/exhale to exit Inhale to enter/exhale to exit

Step 3: Now the big question: Should I be practicing Cobra Pose or Upward Facing Dog?

Cobra Pose is truly a foundational posture. It’s great for improving strength of the lower back and reducing lower back pain. It helps lay the groundwork for deeper backbends by warming up the muscles of the back. This posture also strengthens the glutes, legs and arms. Cobra pose is a safe way to backbend in a vinyasa class for almost everyone. If you have any limitations in your lower back I highly recommend practicing cobra pose. I do not recommend straightening the arms. And I encourage you to be mindful as you backbend, so you’re not compressing the lower back… especially as your back becomes more flexible.

Upward Facing Dog is common mostly in vinyasa style/power yoga classes. I think that it is important to be able to move from high plank to chaturanga (low plank) to upward facing dog to downward facing dog without bringing the hips, knees, thighs down to the mat. If you have the strength to do that you have the strength in your core to support the lower back in this posture.

I recommend always warming up your lower back with a few rounds of low cobra before moving into upward facing dog… so that may mean that you take the first three vinyasas of your yoga class with cobra pose instead of upward dog.

If you’re new to yoga start practicing cobra pose and once you feel strong and confident in cobra begin to practice upward facing dog. Remember the tips I’ve listed here and enjoy your practice.

Please feel free to contact me if you have any questions.

Love and Light,

Autumn

Autumn Adams
Follow me


How to Teach Chaturanga Dandasana

how-to-teach-chaturanga-dandasana

Now is the time to brush up on your knowledge of chaturanga dandasana, so you can teach the pose safely. It is important to keep your student’s shoulders safe in their vinyasa yoga practice. It takes time and patience to master chaturanga.

Chaturanga has gotten a bad rep in the yoga community and has been dubbed the “shoulder shredder” and it’s not without due cause. This pose, when done incorrectly, can destroy the rotator cuff, injure the deltoids, and cause chronic pain in the upper back/neck. So why do we practice it?

Chaturanga Dandasana is an integral part of our yoga practice and when done properly builds strength and stability in the shoulder girdle and builds strength in our core. It’s important to fully master chaturanga before moving on to more advanced arm balances and inversions.

I’ve broken this post down into a few sections. I encourage you to read through all of the sections as there are many components to chaturanga dandasana.

Alignment Cues and Teaching Tips for Chaturanga Dandasana

As always, remember to build the posture from the ground up. A stable and strong posture needs a strong and sturdy foundation.

  • Hands are shoulder width distance.
  • Fingers are spread wide.
  • Press down through knuckles of index finger and thumb (hasta bandha)
  • Start from Plank Pose with the feet hips width distance.
  • Press forward onto your toes, so your heels stack over your toes.
  • Lower halfway down to create a 90 degree angle at the elbows.
  • Elbows stay in close to the body. Don’t let them wing out to the side.
  • Stretch the crown of your head forward and create a long line from the heels out through the crown of the head. Draw your tailbone down toward your heels.
  • Draw the navel in toward the spine to support the lower back.

7 Tips to Keep Your Student’s Shoulders Safe When Teaching Chaturanga Dandasana:

  1. Keep your hands shoulder width distance, fingers spread wide and press down into the base knuckles, particularly of the thumb and index finger.
  2. As you begin to lower down make sure your elbow points are pointing straight back behind you. They are not “winging” out to the side or “squeezing” into the sides of your rib cage. Remember: CHATURANGA IS NOT A PUSH UP! When the elbows wing out to the side the heads of the arm bones dip down, the shoulders round and the sternum sinks.
  3. Only lower half way down, to create a 90° angle at the elbow ie. your forearm is perpendicular to the floor and your upper arm is parallel to the floor.
  4. Think of drawing the shoulders away from your ears in Plank Pose and as you lower. Try not to collapse between the shoulder blades. Try to keep the shoulder blades on your back.
  5. Keep your core strong, press back through your heels, lift the fronts of your thighs and draw the navel in. Stretch the crown of your head forward, gaze is only slightly forward and down (don’t let the head hang).
  6. As you move from Plank Pose to Chaturanga press forward on your toes as you lower down, this will set you up for Upward Facing Dog.
  7. As you work on building strength it’s important to honor your body where it is TODAY, not where you want it to be. It’s okay to lower your knees down to the mat, so you can slowly and safely move through your chaturanga. You can also practice chaturanga at the wall.

Benefits of Chaturanga Dandasana

  • Strengthens wrists, arms (triceps!), and shoulders
  • Strengthens and tones the entire body (hello legs!)
  • Prepares the body for arm balances and inversions

Contraindications for Chaturanga Dandasana

  • Shoulder or wrist injury
  • Pregnancy (although this is debatable)

I hope you find these tips helpful. Please feel free to message me if you need more clarification. I’m always happy to help.

Love and Light,

Autumn

Autumn Adams
Follow me